Hello everybody, it is me, Dave, welcome to my recipe site. Today, I will show you a way to prepare a distinctive dish, quick, easy and delicious daifuku in the microwave. One of my favorites food recipes. This time, I am going to make it a little bit unique. This will be really delicious.
Quick, Easy and Delicious Daifuku in the Microwave is one of the most popular of current trending meals on earth. It’s enjoyed by millions daily. It’s simple, it’s fast, it tastes delicious. They’re nice and they look fantastic. Quick, Easy and Delicious Daifuku in the Microwave is something which I’ve loved my whole life.
Guide to Prepare Quick, Easy and Delicious Daifuku in the Microwave
To begin with this particular recipe, we have to first prepare a few ingredients. You can have quick, easy and delicious daifuku in the microwave using 16 ingredients and 10 steps. Here is how you cook that.
Ingredients
The ingredients needed to make Quick, Easy and Delicious Daifuku in the Microwave:
- Prepare 70 grams ◎Shiratama
- Get 30 grams ◎Joshinko
- Make ready 50 grams ◎Sugar
- Make ready 150 ml Water
- Get 1 tbsp Honey (Optional)
- Take 30 grams Anko (or your favorite filling)
- Prepare 1 Katakuriko
- Get Matcha filling:
- Prepare 50 ml Whipped cream
- Get 1 tsp Sugar
- Get 2 tsp Matcha
- Prepare Chocolate filling:
- Get 50 ml Whipped cream
- Get 1/2 tsp Cocoa powder
- Take 30 grams Chocolate
- Prepare 1 tbsp Milk
Instructions
Steps to make Quick, Easy and Delicious Daifuku in the Microwave:
- The dough for the mochi doesn't take long to make, so prepare the fillings beforehand. Scatter katakuriko on a tray, plate, or container.
- Cover the strawberries in sweet red bean paste. Leave the tip of the strawberry visible so that you remember which side goes up.
- Add the ingredients marked with a ◎ to a microwave-safe bowl and mix well.
- Add water in three batches, whisking well between each addition until the mixture is smooth. When you add the last of the water, put in the honey as well.
- Microwave for 2 minutes at 600 W. Remove and stir well with the whisk.
- Microwave for another minute, then stir vigorously with a pair of chopsticks. Microwave for one more minute, then mix again.
- Place the dough onto a surface dusted with katakuriko, then divide into six even portions and wrap it around the fillings. That's all you need to do for regular daifuku.
- [Matcha Filling] Combine the ingredients for the filling and whip together with a hand mixer. Using a piping bag, squeeze the filling into six equal portions and freeze. Coat with anko while frozen. For the pictures, after I squeezed out the filling, I used my hands to shape into balls.
- [Chocolate Filling] Melt the chocolate and milk together in a double boiler. While it's melting, use a hand mixer to mix the whipped cream and cocoa powder. While the melted chocolate and milk is still hot, add the whipped cream mixture and combine with a hand mixer. Freeze the same way as the matcha filling.
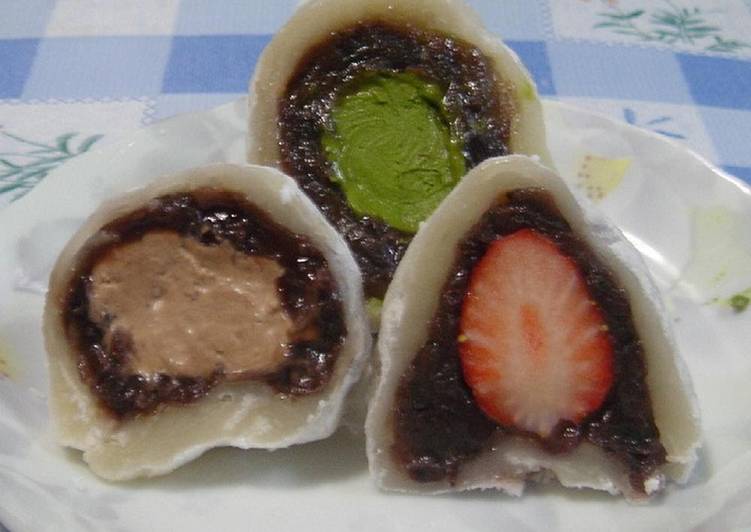
- Make plain, strawberry, matcha or chocolate daifuku. Whatever makes you happy!
As simple as that Steps to Prepare Quick, Easy and Delicious Daifuku in the Microwave
So that is going to wrap this up with this special food quick, easy and delicious daifuku in the microwave recipe. Thank you very much for reading. I’m confident that you will make this at home. There’s gonna be more interesting food at home recipes coming up. Don’t forget to save this page on your browser, and share it to your family, friends and colleague. Thanks again for reading. Go on get cooking!
Print this page