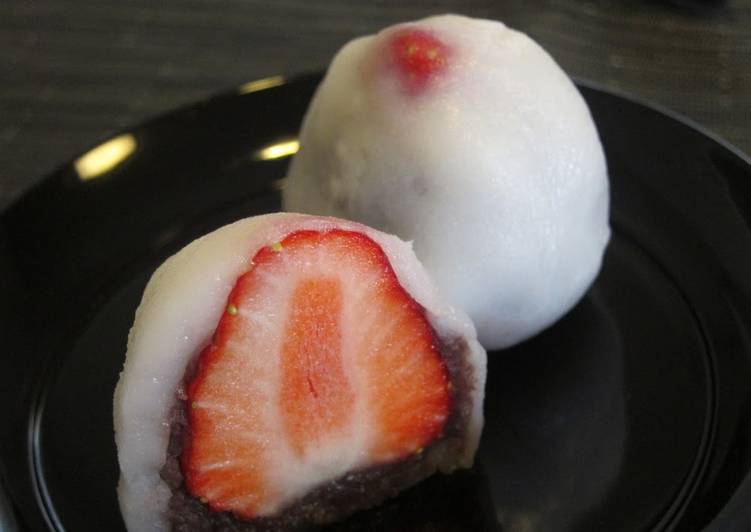
Hello everybody, I hope you’re having an amazing day today. Today, we’re going to make a distinctive dish, microwaved strawberry daifuku (with joshinko). One of my favorites food recipes. This time, I will make it a bit unique. This is gonna smell and look delicious.
Microwaved Strawberry Daifuku (with Joshinko) is one of the most favored of recent trending foods in the world. It’s easy, it is fast, it tastes delicious. It is appreciated by millions every day. They’re nice and they look fantastic. Microwaved Strawberry Daifuku (with Joshinko) is something which I’ve loved my whole life.
Guide to Make Microwaved Strawberry Daifuku (with Joshinko)
To get started with this recipe, we have to prepare a few ingredients. You can cook microwaved strawberry daifuku (with joshinko) using 5 ingredients and 11 steps. Here is how you cook that.
Ingredients
The ingredients needed to make Microwaved Strawberry Daifuku (with Joshinko):
- Prepare 50 grams Joshinko
- Get 20 grams Sugar
- Prepare 90 ml Water
- Get 125 grams Koshi-an (store-bought or
- Take 5 Strawberries
Instructions
Steps to make Microwaved Strawberry Daifuku (with Joshinko):
- Combine the joshinko, sugar and water in a heatproof bowl.
- Mix well with a plastic spatula until smooth and cover with cling film. Microwave (500 W) for 2 minutes.
- Meanwhile, rinse the strawberries, remove hulls, and pat dry well with paper towels.
- Beat the batter well with a pestle until it is no longer floury.
- After cooled enough to handle, moisten your hands and knead the dough gently until smooth.
- Moisten your hands again and divide the dough into 5 portions, in a squeezing motion like this. (Divide into 4 if you use large strawberries.)
- Divide the anko into 5 portions and press into flat pancakes (if you make the centre higher than the edge, it will be easier to wrap the strawberries).
- Place the strawberries on top of the anko and cover the strawberries with the paste leaving the tips uncovered.
- Stretch the prepared dough into flat rounds (if you make the centre higher then the edges you can avoid the making holes when you wrap the strawberries with the anko. It is a way to make the edges quite thin).
- Place the anko with the tips of strawberry facing down on the prepared dough (stretch the dough bigger than the photo if you are beginner. It will be easier).
- Press the anko with your thumb holding the dough. Rotate the dough with the support of the palm of your other hand to wrap the anko completely with the dough.
As simple as that Steps to Prepare Microwaved Strawberry Daifuku (with Joshinko)
So that’s going to wrap this up for this special food microwaved strawberry daifuku (with joshinko) recipe. Thanks so much for your time. I am sure you will make this at home. There is gonna be interesting food in home recipes coming up. Don’t forget to bookmark this page on your browser, and share it to your loved ones, colleague and friends. Thank you for reading. Go on get cooking!
Print this page