Hey everyone, it’s me again, Dan, welcome to my recipe page. Today, I’m gonna show you how to prepare a distinctive dish, kimchi. It is one of my favorites. For mine, I’m gonna make it a bit tasty. This will be really delicious.
Kimchi is one of the most popular of recent trending foods on earth. It’s simple, it’s quick, it tastes delicious. It is enjoyed by millions every day. Kimchi is something which I’ve loved my whole life. They’re nice and they look wonderful.
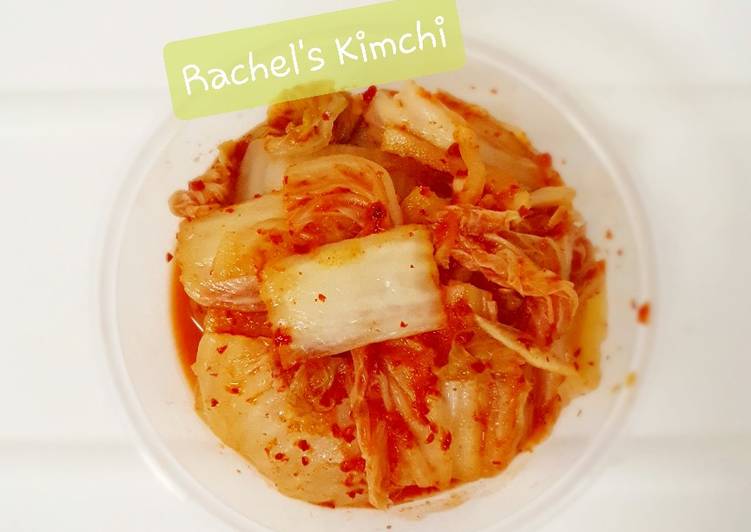
Ponytail Kimchi (Chonggak kimchi: 총각김치). Огуречный кимчи (oisobagi kimchi) и суп из редьки с говядиной. Although many people get a chill through their spine at the very mention of the Although the popularity of kimchi is still rising in the West, it is an ancient dish, dating about two. Kimchi is a traditional Korean dish made of seasoned vegetables and salt.
Recipe of Kimchi
To begin with this recipe, we have to first prepare a few components. You can cook kimchi using 13 ingredients and 8 steps. Here is how you can achieve it.
Ingredients
The ingredients needed to make Kimchi:
- Get 1 kg Nappa Cabbage
- Get 300 gram White Radish
- Get 60 gram Coarse Salt
- Get a
- Take 1 clove Garlic
- Get 60 ml Fish sauce
- Make ready 1 Tablespoon Ginger
- Prepare b
- Take 1 Tablespoon Glutinous Rice Flour
- Get 6 Tablespoon Water
- Take 1 Tablespoon Sugar
- Make ready c
- Prepare 2 1/2 Tablespoon Gochugaru
Your special batch will arrive vacuum sealed with a gel pack and an insulated bag via priority mail. Kimchi is a traditional Korean dish and is a major staple in Korean cuisine. This easy Kimchi recipe will teach you to make authentic Kimchi (Kimchee) at home. It's easy to do with these simple steps!
Instructions
Instructions to make Kimchi:
- Cut the thick white part of the cabbage lengthwise in half. Then, slowly pull apart by hand to separate into two pieces. Do the same for each half to make quarters. Running the knife through all the way would unnecessarily cut off the cabbage leaves.
- Rinse the cabbage with some salt. Pour layer by layer of cut cabbage with coarse salt. Flipping every 30minutes for 3 times, total salting time 1hour 30minutes.
- First 30minutes, mix Ingredients B, and boil until translucent. Leave it to cool. Then, flip the cabbage.
- Second 30minutes, Blend Ingredients A in to paste and keep aside. Then, flip the cabbage.
- Last 30minutes, flip the cabbage. After 1 hour 30minues, the cabbage is ready to rinse 3 times to remove excess salt. Let it drain.
- Thinly slice the radish into matchsticks. Mix Ingredients A,B, & C in a mixing bowl to paste
- Pour paste on cabbage and mix thoroughly by using hand gloves. Once mix, slowly transfer it into a sufficient airtight container/glass.
- Press the kimchi to the bottom,make sure no air at bottom or in between. Let it sit and ferment for 2-3 days without peeping it. Put it in fridge once fermented for better taste.
Kimchi is a traditional Korean dish of fermented vegetables, the most. Kimchi is a spicy side dish made from fermented vegetables and Korean red pepper, and is loaded with potential health benefits. It is a staple of the Korean diet, and its popularity has surged worldwide. See more ideas about Kimchi recipe, Kimchi, Maangchi. How to make Kimchi-bokkeumbap (or kimchi bokkeumbap, kimchi bok eum bap, kimchi bokkeum bap, gimchi bokkeumbap), Kimchi fried.
As simple as that Recipe of Kimchi
So that’s going to wrap it up with this special food kimchi recipe. Thank you very much for reading. I’m confident that you will make this at home. There’s gonna be more interesting food at home recipes coming up. Don’t forget to bookmark this page on your browser, and share it to your family, friends and colleague. Thank you for reading. Go on get cooking!
Print this page